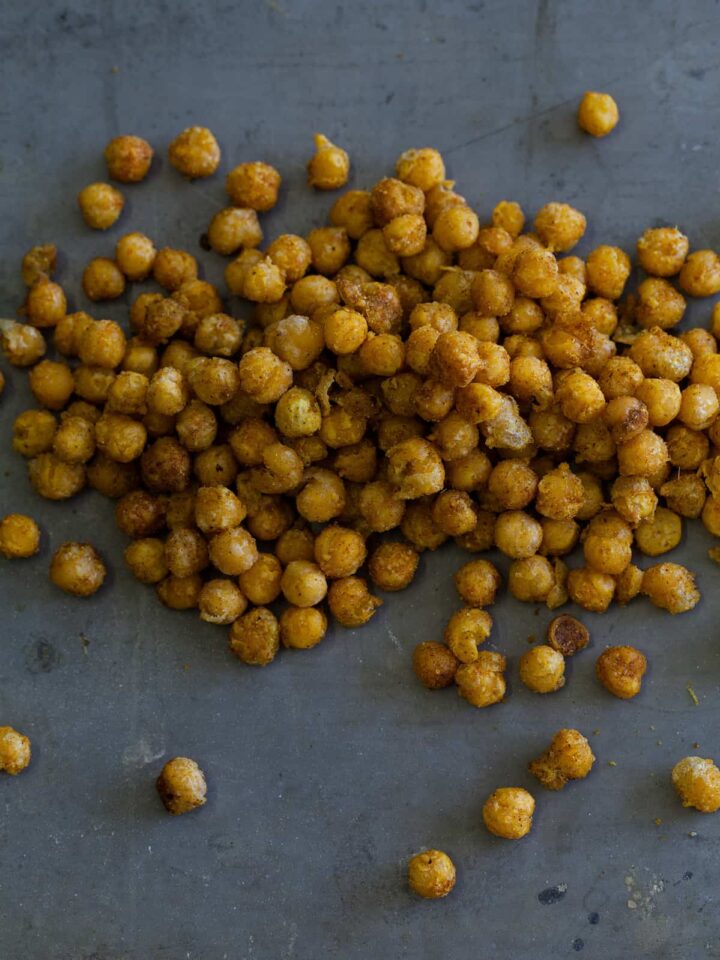
Curry Fried Chickpeas. This is something that I didn't even realize existed till I had them recently. It was totally a surprise. Like when I learned young Disney stars were not that innocent. Only ...
Archives for September 2011
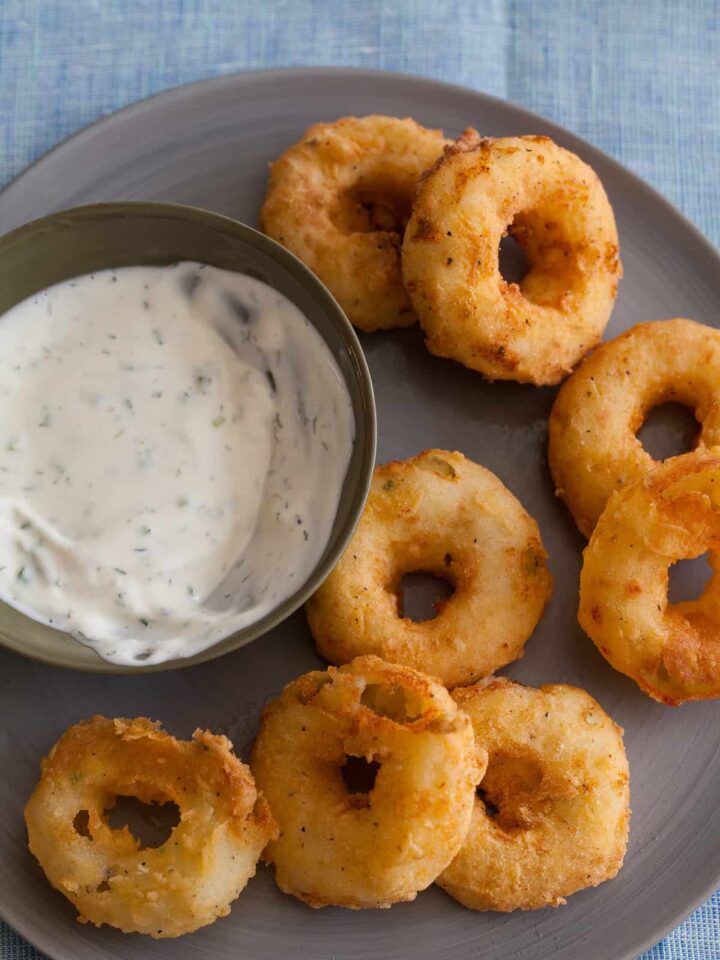
Potato Rings with Homemade Buttermilk Ranch
If french fries and onion rings ever got together and had a love child, I think it would be something like this...a light and crispy on the outside + creamy and luscious on the inside potato ring! Two ...
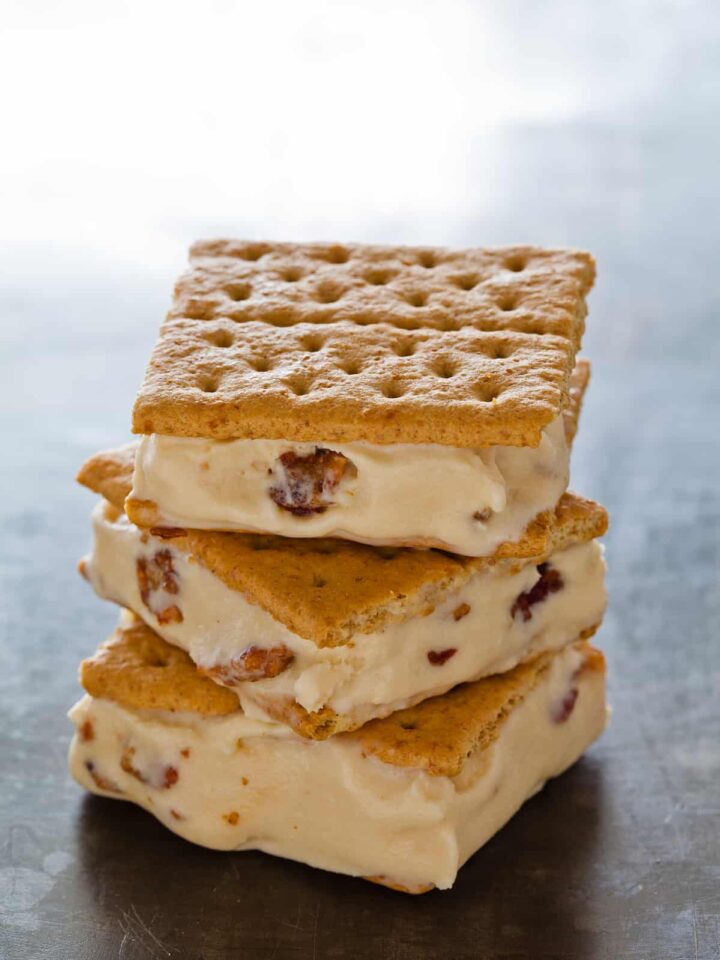
Salted Caramel and Candied Bacon Ice Cream
So remember how I've told you guys before that I don't have much of a sweet tooth? Well, it's true. I'll choose scrambled eggs and bacon over a pastry or muffin any day, I'd rather indulge on a ...
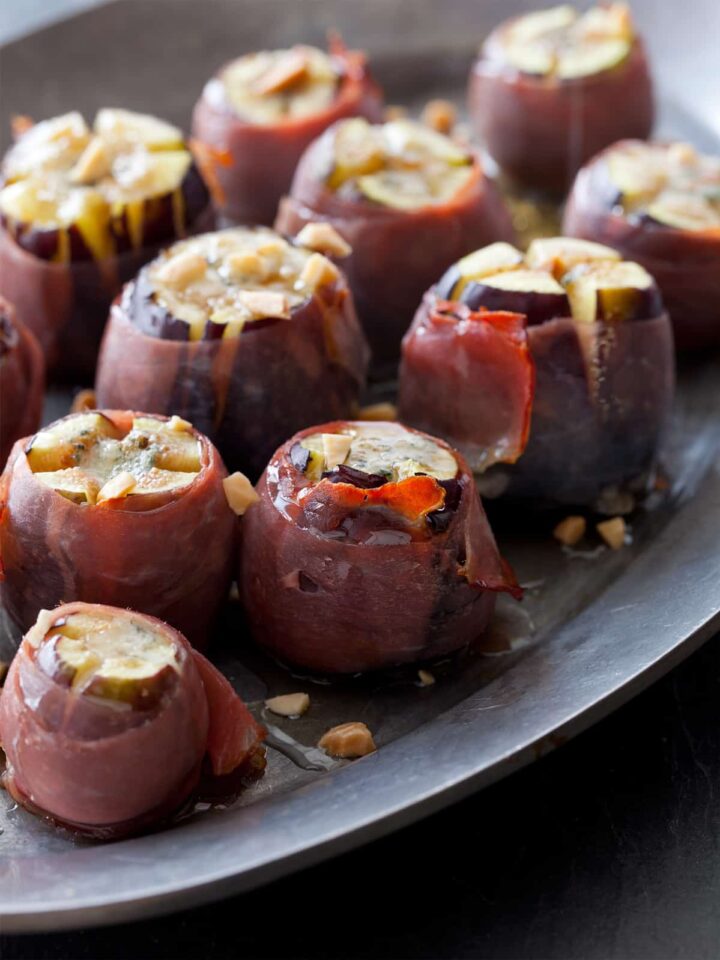
Bleu Cheese Stuffed Figs
Figs are one of my favorite foods ever. I think I like them so much because fig season is incredibly short and they're nearly impossible to find fresh out of season. So when they are in season I go a ...
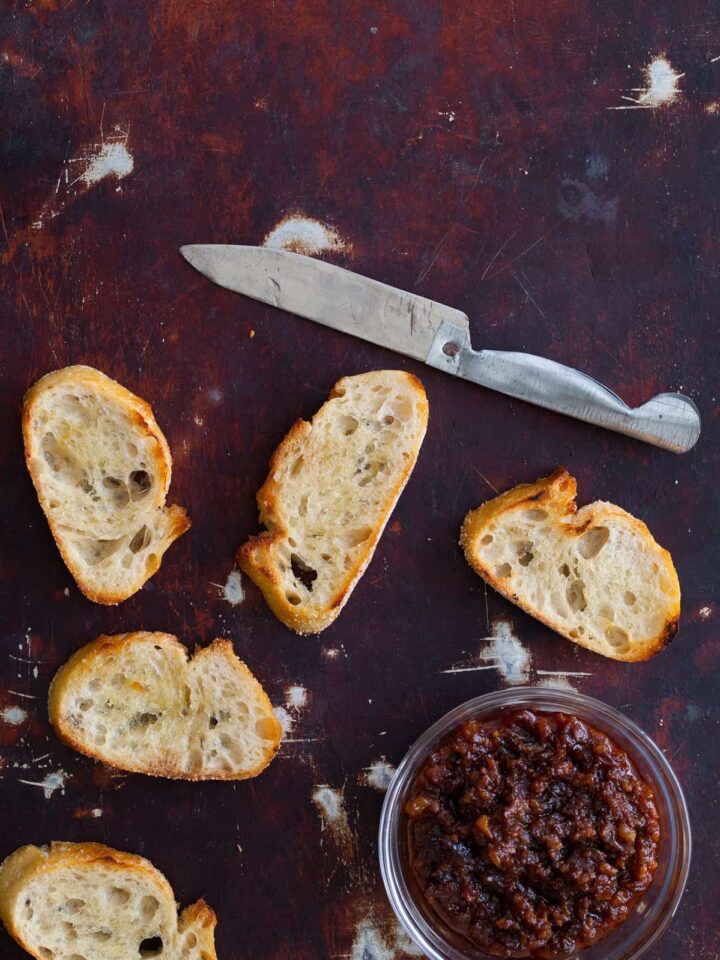
Boozy Bacon Jam
Boozy.Bacon.Jam. Yep, that's right....Boozy.Bacon.Jam. Don't those words together just get you all excited?! My first experience (or non-experience) with it was last fall when I was visiting my best ...